How I Designed & Built My Observatory

Einstein Tower, 1921. One of my favourite building sections

Kielder Observatory - click to follow link
Inspiration
I have always aspired to have an observatory. The idea of strolling out to the garden and finding your equipment waiting for you, all ready to go is very exciting after years of fumbling in the dark with cold fingers and reducing enthusiasm. Having recently imaged 7 deep sky objects in one night, the benefits and comfort of a permanent setup cannot be underestimated for maximising and enjoying your time observing.
I have seen backyard off-the-shelf domes at London’s Astrofest for the past few years but have been put off by the cost and ostentation of a gleaming white (or green) dome. They look great, but slightly incongruous in suburban back garden. In 2017 whilst on holiday, I read Gary Fildes ‘An Astronomer’s Tale’ describing his inspirational story; his amateur passion in astronomy resulting in him setting up the Keilder Observatory and becoming it’s lead astronomer. Being an architect myself (by day), I was aware of this observatory and admired it’s design and use of timber. I liked the use of rectilinear forms rather than traditional domes, and it made me think that I could knock something up myself without the need for forming complex curves. Returning from that holiday, I set about sketching out designs for a bespoke observatory to sit in my back garden. A seed had been sown.

click here to open up a set of design sketches
Design
I kept a sketchbook of ideas (many unrealised) for the overall shape or how particular components needed to work. The observatory had to have elements that rotated or slide off, whilst being watertight and secure. Think of building types that are required to move and you realise that observatories are a unique type of architecture. I was aware of roll-off roof designs or those who have adapted sheds, but wanted to try something more bespoke. Also Roll-off roofs require twice the footprint of the shed, and I didn’t want to give up that much garden.
I should declare that I am not a DIY expert. I do not have a workshop of tools at my disposal; the whole project was completed with readily accessible sheeting materials from Wickes/B&Q, hand tools and through designing element that could be lifted and erected by me alone.

Levelled base and pier foundation dug

Floor joists, concrete base and pier test
The Octagon
I settled on an octagonal design. Using a 2400mm square base (a handy module for sleeper lengths and most timber based sheets), an octagon created 8 equal sides around 900mm = seven fixed panels and one door. I laid out the floor structure first, and cast a concrete foundation for steel pier. This was my first experience of mixing concrete using pre-mix bags, and it was not as traumatic as I feared. That said, my clay soil prevented me going anywhere near as deep as the recommendations. I had to trust it would be fine.
I fed a power supply under the floor from the house, then assembled 8 simple wall panels framed in softwood, making each high enough for me (6’1”) to stand in. This is higher than dome designs where the edges are much lower (c.1200mm) offering more sky and a lower horizon. I was not too fussed about this as my observatory would sit alongside an 1800mm high fence and hedge, so this, rather than the wall height, limited my horizon. Higher walls also meant less stray street light entering and no view in/out of neighbouring houses. On a long Bank Holiday weekend in August, I checked the forecast, then began the assembly off all the prefabricated elements I had been making up to this point.

Wall panels, un-clad as high as the surrounding obstructions. The nearest frame became the door

The ring (or track), later mounted onto the wall frames for the wheels to run inside in a perfect(ish) circle
The Roof
The key element of the design was the roof. Salvaging four casters off the old office server cabinet, I screwed these to the underside of an octagonal lid with a central slot and gentle falls. The wheels ran inside a ring mounted between the walls and the roof into which I formed a track using two thicknesses of 18mm OSB board. The roof was locked in horizontally - it could never leave the track and only be rolled left or right. The casters were able to pivot so I fixed their path with cable ties to avoid the wonky supermarket trolley effect. I used a template to cut the track pieces with a handheld jigsaw and formed two halves which I lifted onto the walls and fixed together. This ring also helps act as a diaphragm to tie the walls together. I’m not an engineer - I didn’t calculate anything or check any loads, I just went by eye and common sense. The centre of the roof has a sliding lid that extended past the centre point of the octagon on plan allowing views to the zenith. Here I would have a steel pier for my equatorial mount.
4 casters running in the track and rolling middle lid portion

With felt, low parapet edge and gutters (no downpipes)
Completion
Once the roof was on and rotating freely, I set about cladding the inside and outside of the frame. The roof was the most spontaneous piece of the design; I created falls (tested with golf balls) to short gutter sections and covered the whole thing in good quality shed felt (more on this later). I had previously purchased an Altair Astro steel pier with adjustable top plate and installed it on my concrete base. I built a door and hung it on hinges, fitted locks and adding external handles to aid the rotation of the roof. It was essentially ready for a test by around September 2017.


Modifications
The design essentially worked, but like all prototypes, was not without its issues. The main issue was the roof, which I had built too flat, too heavy and too high at the edges which meant it was hard to more, limited my horizon and leaked. The falls were too shallow to shed the water so it ponded and seeped through after a while. To counter this I bought a cover and slung it over the whole roof. Tip: don’t bother with cheap external garden furniture covers, go straight to eBay and get a 610gsm PVC sheet like you get on the sides of HGVs.
I added metal hoops to the base and got some retractable crank straps to hold the cover down. This helped, but looked crap and was a barrier to using the roof, requiring ladders and not small amount of huffing and puffing to get it on and off. This was not part of the easy stroll into the garden. Internally I bought an extension to the pier to raise up the height of the mount to help me see more horizon. For added comfort I got a DAB radio and some Christmas lights strung around the eaves.

New roof form, wing pitches and full front-to-back slot

In-situ with curved section top sections
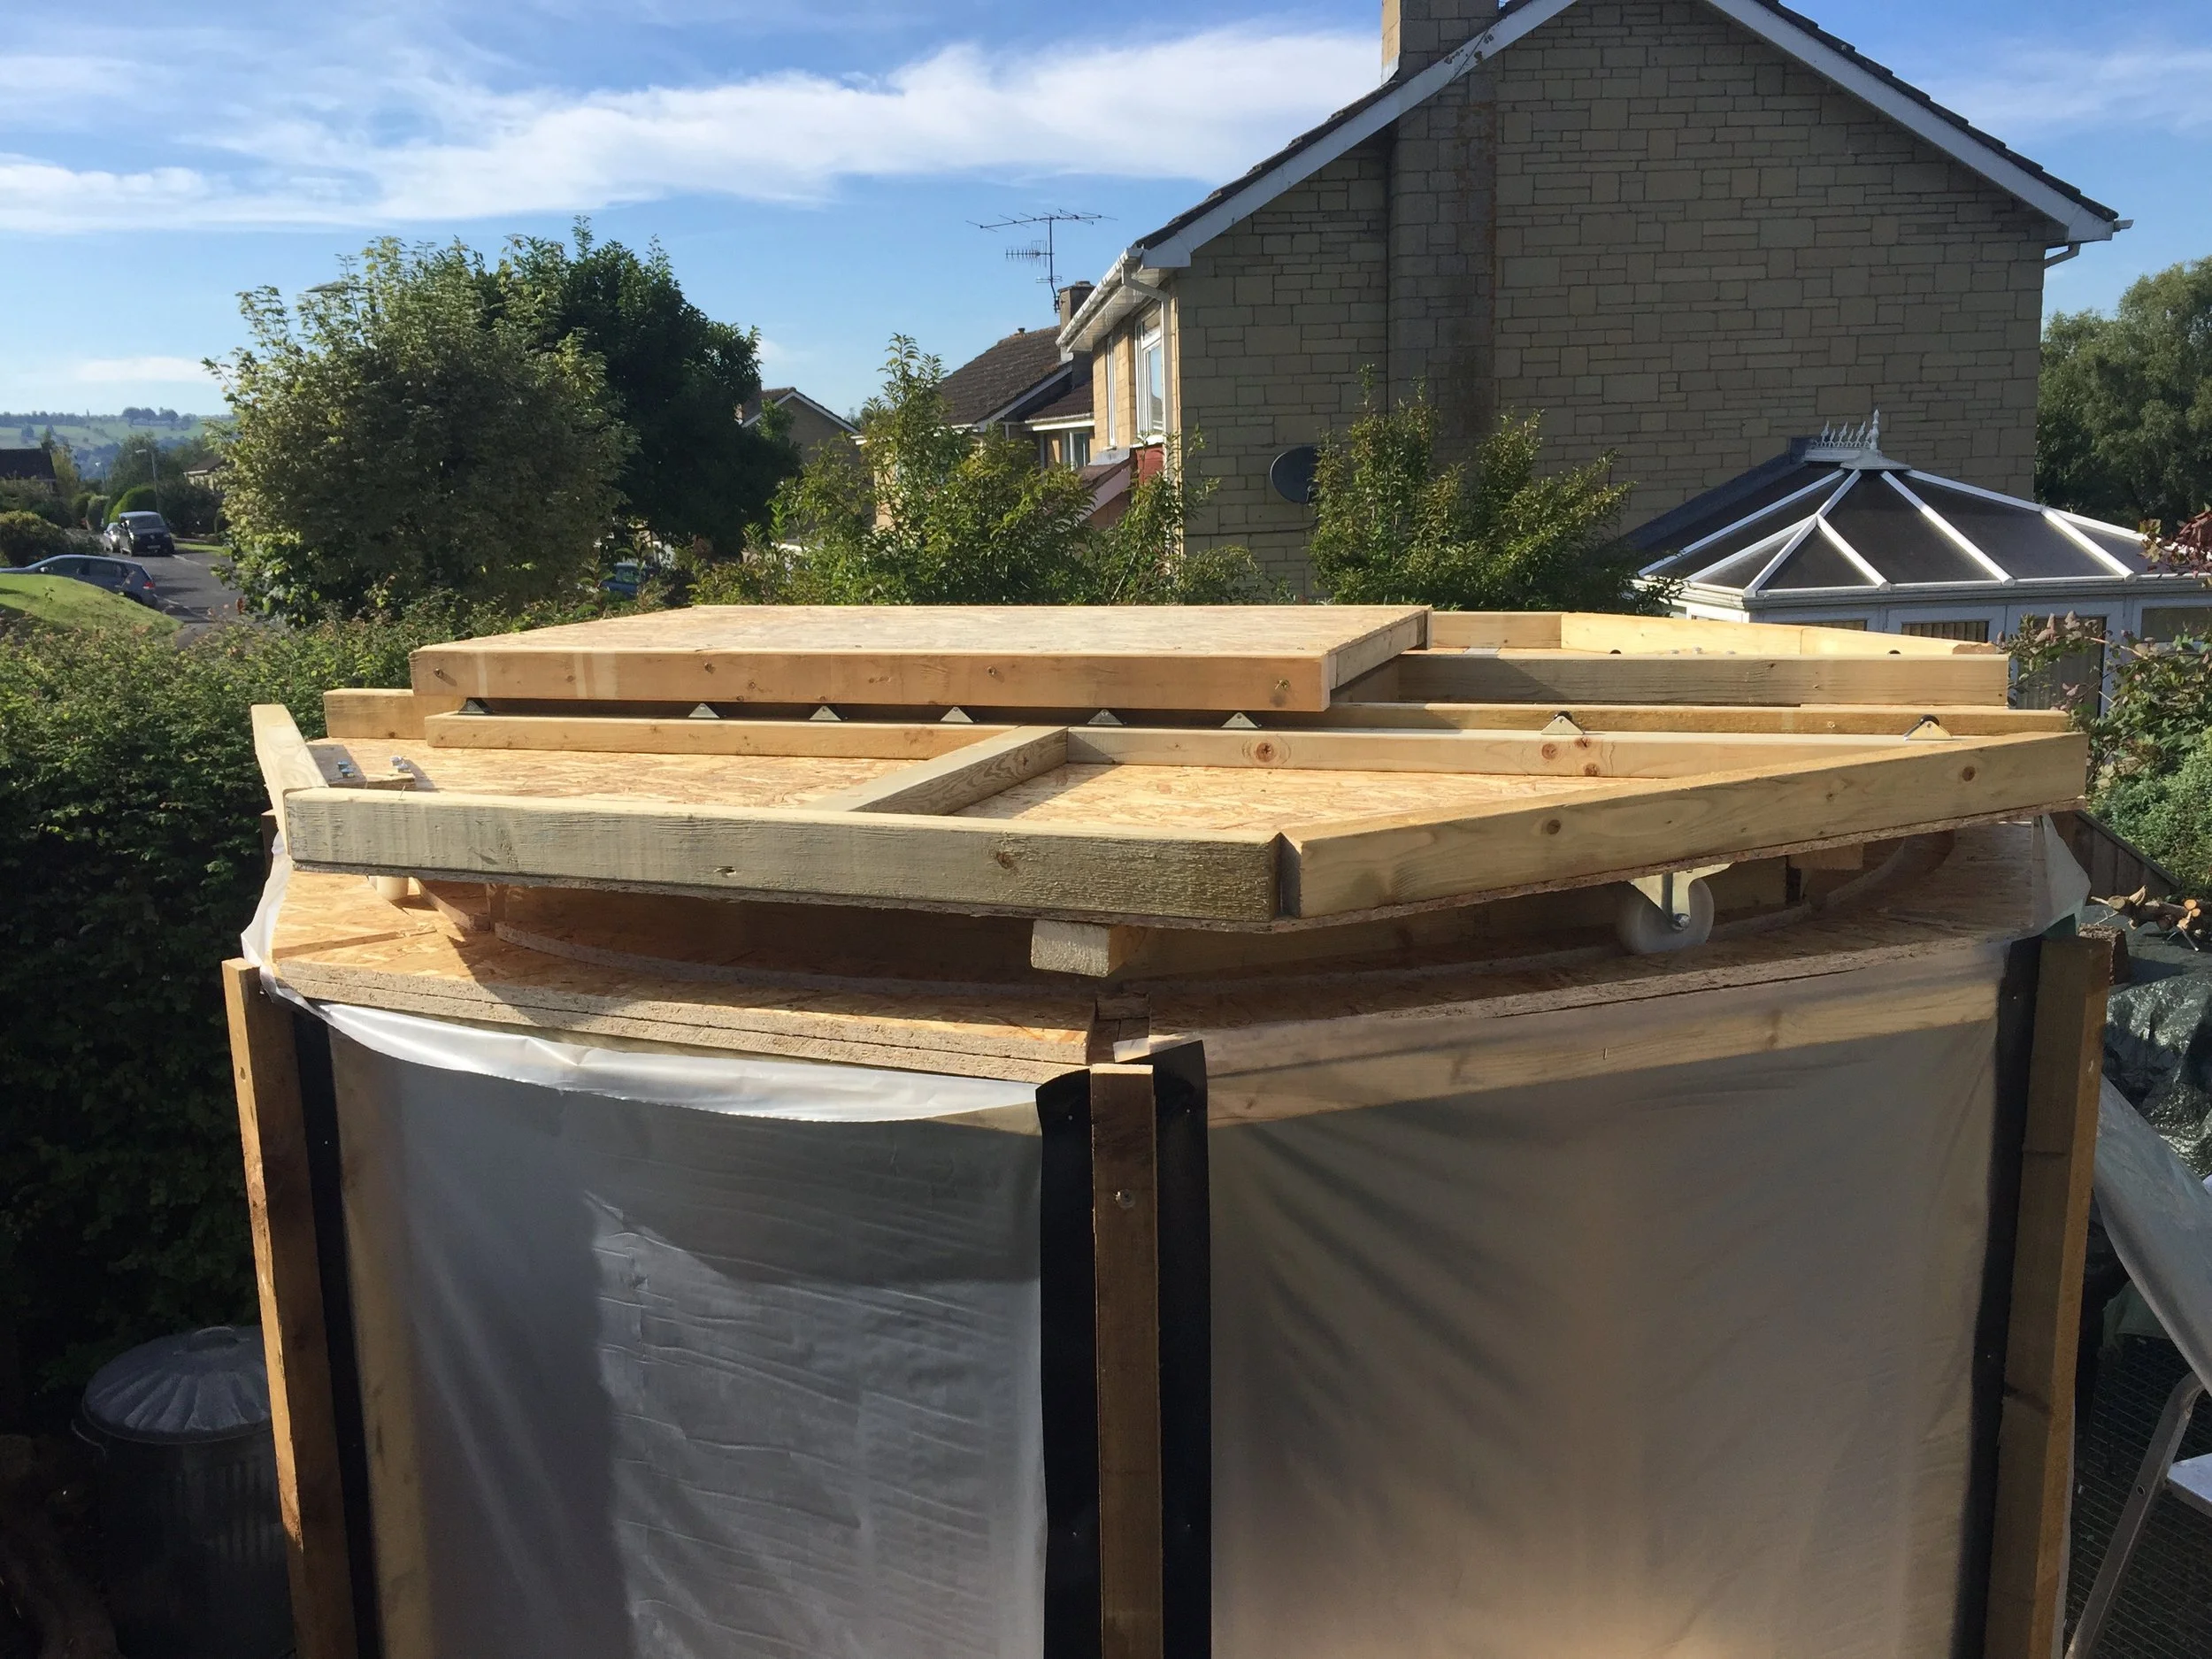
New Roof
The success of the PVC cover told me that I needed a new roof design. I set about redesigning everything from the track/ring upwards to make it steeper, lighter and planned to wrap the roof in a new piece of the PVC which acted more like commercially available single ply roofing. The new design has two shaped beams that create a full length slot, with each supporting a ‘wing’ of roof. The beams have casters for rolling roof sections. The top sections are a combination of rolling or removable sections which took a lot of care to ensure water would not enter (the more junctions = the more opportunities).
Again, picking a long dry weekend, I demolished the old roof and fixed up the new in sections assembled in tests on the ground. It relied entirely on the accuracy of my circles forming the track and new mini casters fixed to the new roof (giving a shallower rise that the old casters). I used using the old cover as short term weather protection. I’m please to report this new roof has not yet leaked a drop, is lighter to manoeuvre and offers a lower horizon for observations. I also remade the door as it had warped over the winter and was a pain to use.

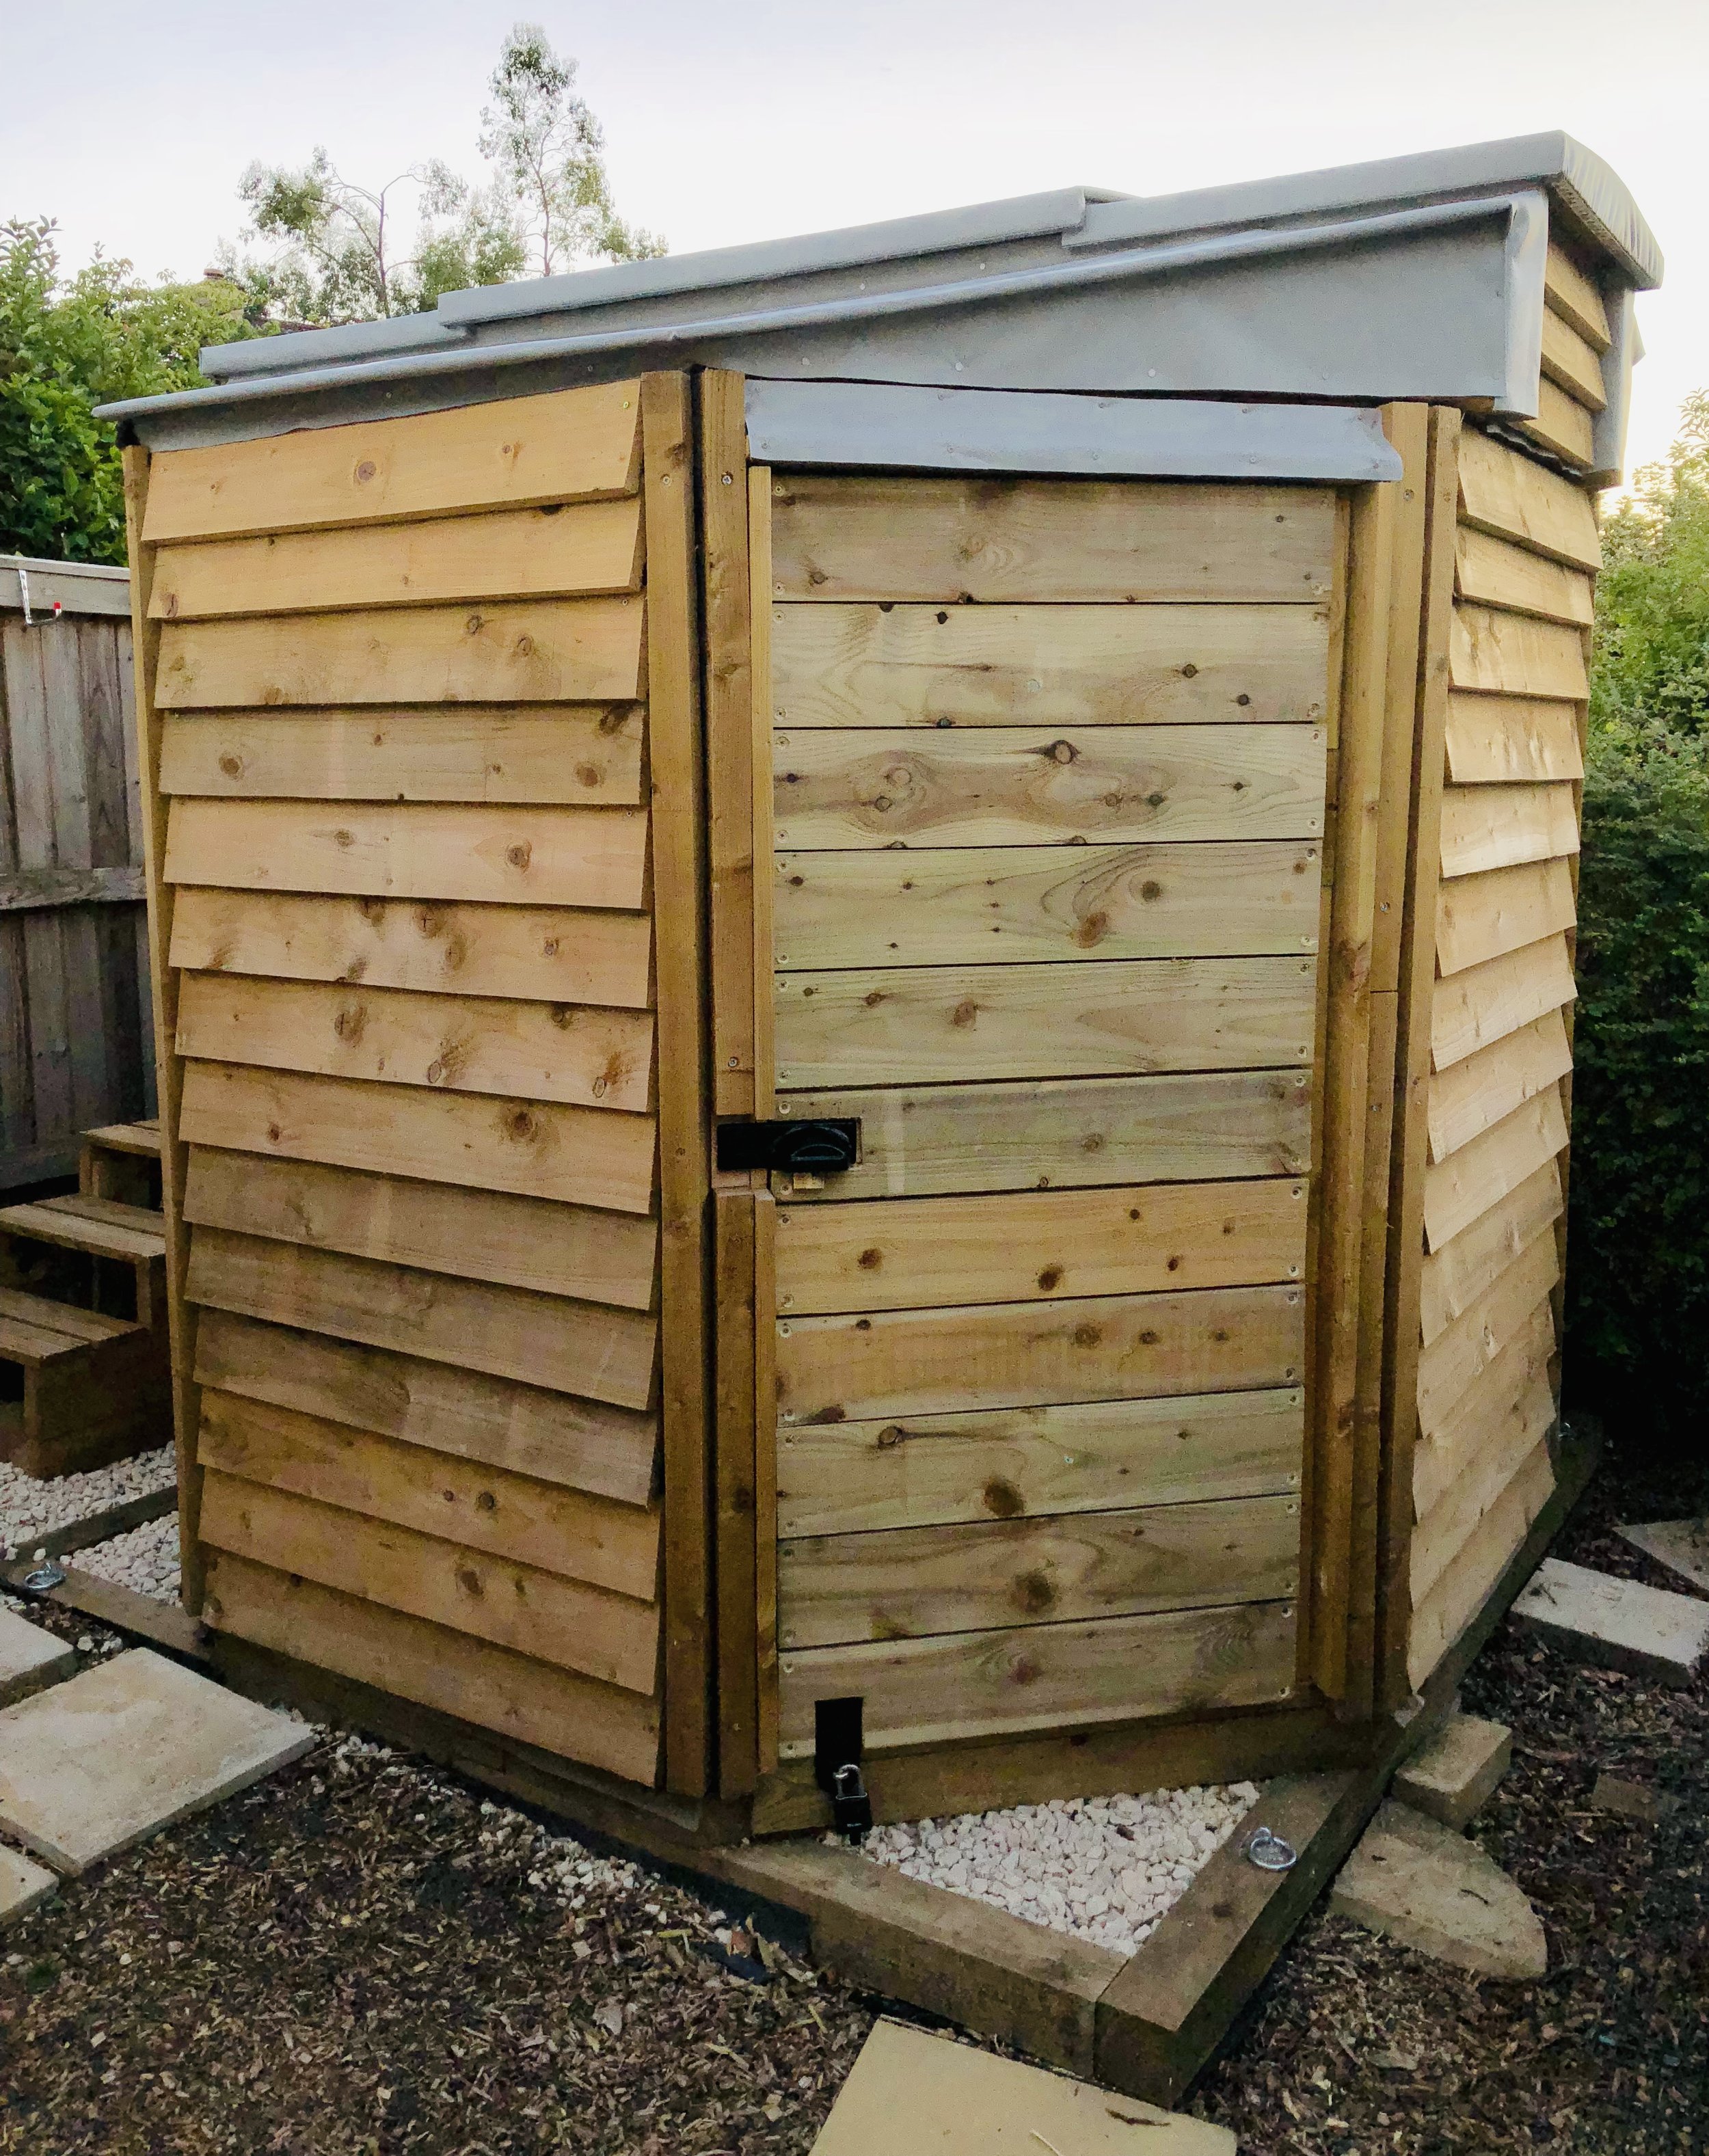
New roof fully waterproofed with 610gsm PVC sheet

Inside the BLT!
Lessons Learned
The design and build process was highly enjoyable and kept me busy for a number of months. Good planning meant that it came together from a kit of parts remarkably well despite my inaccuracies of sawing and sheet cutting. The new roof is a vast improvement though does still sometimes get a little sticky when trying to rotate it - I find it goes better clockwise. I made some steps alongside one elevation to aid the manual rotation. I have various locks, straps and ties to keep all the moving sections secure and wind proof.
During last winter a rat took up residence underneath, which led to an array of traps and bunging up of holes. Having evicted my guest, there is now a mesh skirt around the base and I’m certain that now when I observe, it is only me and the universe.
Update August 2019:
In early August I noticed wasps around the base of one of the wall panels and suspected a nest inside the walls, behind the cladding where I had left a void. This was confirmed by a wasp removal expert who donned his suit and sprayed his death powder up into the cavity. Following this, I thought it best to systematically remove the external cladding to each wall panel (7 in total - the 8th is the door) and infill with insulation. In doing so I found the nest which was the size of a large dinner plate up the top of the wall cavity. I sourced some 50mm thick 2400x600mm polystyrene sheets - each would infill one side. I fitted these over a weekend and have hopefully seen the last of the wasps.
“If you are thinking of embarking on an observatory project - do it! It will transform how you observe and encourage you outside on those cold winter nights.”